Search Nuala's Kitchen

Sunday, 24 July 2011

Anzac Biscuits


It is very difficult to find a truly Australian recipe. After Australia was discovered in the 17 century people from different countries moved there are brought with them thier own recipes from thier country.
Anzac biscuits are seen as an Australian biscuit but it is thought that the Anzac biscuit was based on Scottish biscuit recipe using rolled oats. Anzac biscuits were orginally called Soldier biscuits but the name was then changed to Anzac biscuits when soldiers landed in the Gallipoli Islands.  In WW1 Australian and New Zealand wives sent Anzac biscuits over to soldiers who were fighting abroad. Anzac biscuits use basic ingredients and have a very long shelf life. You may notice that there is no egg in Anzac biscuits this is because at a time a war there was a shortage of poultry farmers so eggs were scarse. They are therefore ideal to send over soldiers and make during a war.

Anzac biscuits are very simple to make. The method is very similar to how muffins are made as you mix all the dry ingredients together and the wet ingredients together and then the all together.   

Anzac Biscuits
Makes 20 biscuits

Anzac Biscuits

 Ingredients:
1 cup rolled oats
1/2 plain flour
1/2 self raising flour
1 cup desiccated coconut
1 cup brown sugar
125g unsalted butter
2 tablespoons golden syrup
1 teaspoon bicarbonate of soda


Method:
  1. Preheat the oven to C150. Line 2 baking trays.
  2. Put the oats, both flours, coconut and sugar into a large bowl. Mix together.
  3. Place the butter and golden syrup into a pan, over a low heat. Once the butter has melted set aside.
  4. In a jug mix the bicarbonate of soda with 2 tablespoons boiling water.
  5. Pour the bicarb mixture over the butter mixture and mix together. The mixture should foam up. This is a sign that the bicarbonate of soda is reacting with the butter and golden syrup.
  6. Pour the butter, golden syrup, water and bicarbonate of soda mixture over the dry ingredients and mix together.
  7. Roll tablespoons of the mixture into balls and place onto the baking tray (remember to allow for spreading). Press the balls to flatten them so they are about an inch high.
  8. Cook in the oven for 15 - 20 minutes. Cook on the tray for around 5 minutes before transferring to a wire rack to cool.

Saturday, 16 July 2011

Dinner Party Distasters!

I wanted to create a black forest cupcake, instead of the usual Black Forest Cake. A Black Forest Cake usually consists of a chocolate cake filled with whipped cream and cherries and the sides of the cake are cover in flaked almonds. I wanted to make this into a cupcake by spooning the middle out of a cupcake and filling it with cherry jam. Then to pipe whipped cream on top, and sprinkle with toasted flaked almonds (as this gives the almonds more colour against the white whipped cream) and finally to place a cherry on top.

I used one of my favourite chocolate cake recipes from Peggy Porschen's cookbook. I have used this recipe many times before and therefore know that it works. When I made these cupcakes I didn't read the recipe correctly, and therefore added some of the ingredients in the wrong order; which had a big effect on the outcome of the cupcakes. I also added a 50g too much sugar; as I was lazy and poured the sugar straight into the pan of milk and a bit too much came out. The cupcakes didn't rise but spread out over the cupcake case. Also some of the cupcakes stuck  to the pan and didn't gel together but crumbled when turned out. If a cookie has too much sugar in it then it will spread out on the baking tray and not rise; which is exactly what happened to me!

To save the cakes I decided to layer them in a glass. The bottom of the glass was filled with a layer of chocolate cake and then some cherry jam. This was then covered with more chocolate cake. The top was finished with whipped cream, a sprinkle of flaked almonds and a cherry.

Chocolate Cupcakes
Makes 24 mini cupcakes

Ingredients:
FOR THE CAKE:
75g dark chocolate
100ml milk
225g light brown sugar
75g salted butter, softened
2 eggs
150g plain flour
2 teaspoons cocoa powder
1/2 teaspoon baking powder
1/2 bicarbonate of soda 
FOR THE TOP:
100g cherry conserve / jam
300ml double cream
2 tablespoons castor sugar
24 fresh cherries
50g toasted flaked almonds

Method:
  1. Grease 24 cupcakes holes. Preheat the oven to C160.
  2. Put the chocolate, milk and half of the sugar into a saucepan and bring to the boil. Take off the heat.
  3. Put the butter and other half of the sugar into the bowl of an electric mixer. Beat for 3 - 4 minutes until the sugar has dissolved and the mixture is light and fluffy. Add the eggs one at a time, mixing well after each addition.
  4. Add the flour, cocoa, baking powder and bicarbonate of soda into the egg mixture and whisk at a low speed until just combined. Pour in the mixture from the saucepan slowly into the other mixture whilst whisking at a low speed.
  5. Once combined spoon the mixture into the cupcake cases, filling the cases to about two thirds full.  
  6. Cook for 13 - 18 minutes or until golden at the edges. Cool.
  7. Pour the double cream and sugar into the bowl  and whisk until soft peaks are formed.
  8. Using a teaspoon spoon out part of the middle of a cupcake and fill it with a small blob of cherry jam. Next pipe whipped cream on top, and then sprinkle with toasted flaked almonds and finally place a cherry on top.

Thursday, 14 July 2011

Teacher's Gifts

Brownies but as a cookie!
Every year at the end of term, many parents ponder on whether to give the teachers gifts and if they do decide to give them a gift what do you give them?My simple answer to this is to give some yummy scrummy home baked gifts as a token of appreciation to the teachers. 

I chose to make the 'Brownies but as a Cookie' cookies as they are so irresistibly yummy! As long as the teacher likes chocolate these are the perfect gift. I put my cookies into a clear plastic bag (you can buy these from Lakeland) and then added a tag and some pretty ribbons. But the best thing is that you can eat a few cookies yourself!

Wednesday, 6 July 2011

Chocolate Victoria Sponge

Chocolate Victoria Sponge
The usual summer afternoon cake is a classic Victoria sponge; a plain sponge filled with either strawberry jam or strawberry jam and whipped cream, then dusted with icing sugar. I do like this wonderful cake but as you know my loyalty lies with chocolate! So to update this classic summer cake I altered the recipe slightly. The best summer flavour to put with chocolate is strawberries; a match made in heaven! So instead my cake consists of a chocolate sponge filled with the classic strawberries and whipped cream and then dusted with cocoa powder instead of icing sugar. The cocoa powder gives the cake a rich chocolate flavour which contrasts with the sweet whipped cream and fresh English strawberries and finishes it off beautifully!


Chocolate Victoria Sponge

Ingredients:
FOR THE CAKE:
225g margarine
225g Castor sugar
Chocolate Victoria Sponge
4 eggs
2 tablespoons milk
225g self raising flour
25g cocoa powder
FOR THE FILLING:
250ml double cream
2 tablespoon Castor sugar
200g fresh strawberries diced and halved
Cocoa powder for dusting

Method:
  1. To make the cake: Preheat the oven to C180. Grease and flour two round 20cm cake tins. 
  2. In the bowl of an electric mixer beat the margarine and sugar together until light and fluffy. 
  3. Add the eggs one at a time mixing at a low speed after each addition. Add the milk with the last egg. If the mixture curdles don't worry as when you add the flour it will become uncurdled. 
  4. Add the flour and cocoa powder and mix at a low speed until just combined. Be careful not to over mix as this will produce a tough cake.  
  5. Split the mixture evenly between the two cake tins. Using an off-set spatula spread the mixture evenly around. Make the mixture higher at the edges as the middle will always rise higher then the edges. This helps to produce an even cake. Place in the middle shelf of the oven and cook for between 20 mins - 30 mins. Until the edges of the cake are golden brown and a skewer inserted into the centre of the cake comes out clean. Leave the cakes to cool for around 30minuites.
  6. To make the filling: Pour the cream and sugar into a large bowl and mix with a large whisk until the cream is at a stiff peak consistency.
  7. Put the bottom layer of the cake onto a plate and then spread over half of the cream. Arrange the strawberries around the edge of the cake and then place the rest of the strawberries in the centre of the cake. Spread the other half of the cream over the top of the strawberries and level out. Place the other cake on top and then dust with cocoa powder.
  8. ENJOY!

Monday, 27 June 2011

The Masterpiece


Well, I had an image in my head of a beautiful cake looking very professional, but it didn't quite turn out to be that way! I think I still need a bit more practise to get to Peggy Porschen's standards! The cake was moist and the flavours were amazing; the rich dark chocolate with the slightly acidic orange were a very good combination. When the cake was cut the different colours or icing against the cake looked really good. 

The final outcome of the cake wasn't completely what I had hoped for. I found that the sugar paste (which I covered the final layer of the cake with) wasn't as easy to work with as it cracked and broke as I tried to lay it over the cake. I guess next time I need to keep the sugar paste more moist to help prevent the cracking and the icing drying out.

I used Peggy Porschen's basic Victoria sponge cake recipe and add some orange peel to give the orange flavour. I also used Peggy's Porschen's recipe for an English butter cream, which was equal proportions of butter and icing sugar beaten together. I made all the butter cream and the cakes the day before so they had time to infuse with their flavours and were all ready to start icing the next day.

Peggy Porschen's Victoria Sponge
Makes two 20cm round cakes

Ingredients:
For Cake:
400g Castor sugar
400g unsalted butter
6 medium eggs
400g self raising flour
Zest of 2 oranges
For Sugar Syrup:
75g sugar
5 tablespoons freshly squeezed orange juice


Method:
  1. Preheat the oven to C180. Line and grease two 20cm round cakes tins.
  2. Cream the butter in a bowl of an electric mixer, until softened.
  3. Add the sugar into the butter and cream until light and fluffy and the sugar has dissolved into the butter.
  4. Crack the eggs into a bowl and whisk together. Slowly pour the eggs into the butter and sugar mixture a little at a time mixing at a low speed after each addition.
  5. When the mixture is combined add the flour and orange zest. Mix at a low speed until just combined as being careful not to over mix the batter.  
  6. Pour half of the mixture into one tin and half into the other tin. Cook for around 20mins to 30mins.
  7. To make the sugar syrup put the sugar and the orange juice into a pan and bring to the boil and then take off the heat and cool.
  8. Cool the cakes in their tins for 15 minutes before pouring over the sugar syrup. Let the sugar syrup infuse into the cake for about 30 minutes before removing from the tins. Later remove the cakes from their tins and wrap in cling film until they are very to use.
Peggy Porschen's English Butter cream
Makes enough butter cream to cover the cake in orange flavoured butter cream and to ice the middle of a 20cm round cake with chocolate butter cream.

Ingredients:
For Chocolate butter cream:
125g dark chocolate
125ml single cream
125g unsalted butter
125g icing sugar
For Orange butter cream:
375g unsalted butter
375g icing sugar
Zest of 1 large orange

Method:
  1. For Chocolate Butter cream: Break up the chocolate into small pieces into a bowl. Pour the cream into a pan and bring to the boil. Once it has reached boiling point pour it over the broken chocolate and whisk until smooth. Be careful not the over whisk it as this could cause it to separate. If you ganache separates then read this post: 'Help, my ganache has separated'. Leave the ganache to cool at room temperate, do not put in into the fridge or freezer as this will cause it to separate. Meanwhile beat the butter and icing sugar in the bowl of an electric mixer, until light and fluffy. Pour the cooled ganache in slowly to the butter cream whilst the mixer is on a low speed. When fully combined put the icing into the fridge until it has hardened.
  2. For Orange butter cream: Put the butter, icing sugar and orange zest into a bowl of an electric mixture and beat until light and fluffy.
To Construct the cake:
You will also need 450g sugar paste to cover the outside of the cake and some icing sugar and water to pipe onto the cake.
  1. Cut the top of the cake so that it is straight with a large serrated knife, then cut each cake in half. So you know have 4 different layers of cake.  Choose the flattest and straightest cake to be for the very top layer and a semi straight one for the bottom layer.
  2. Place one layer of cake onto a board and spread one third of the chocolate butter cream onto the layer making sure the icing doesn't go down the sides of the cake. unless the next layer of cake is completely straight try to build up the butter cream along the outer side of the cake so that it is flatter. Place the next layer of the cake on top of the icing. Repeat this process until the all the layers have been used. Place the cake into the fridge for 30 minutes to harden it before icing the outside of the cake.
  3. Remove the cake from the fridge and ice the top and outside of the cake with the orange butter cream.
  4. Place in the fridge to harden for 30 minutes whilst you roll out the sugar paste.
  5. Take the cake out of the fridge and using the rolling pin lay the sugar paste over the cake. Cut off the excess sugar paste at the bottom. I tied 2 ribbons around the bottom of the cake to cover up the un-tidiness!

Tuesday, 21 June 2011

Peggy Porschen


Peggy Porschen's Cafe
I discovered Peggy Porschen when I saw one of her amazing cookery books in a shop and couldn't resist buying it. The book was called 'Cake Chic' and included many reliable recipes for making different cakes. As well as inspiring decorating ideas and beautiful pictures of all of her cakes.

Visit Peggy Porschen's website at http://www.peggyporschen.com/ .

The first cake that I attempted was one called 'Mochaccino Dots'. It was a square chocolate cake layered with alternating flavours of butter cream; mocha butter cream and vanilla butter cream. The top was decorated with a layer of brown sugar paste and then large dots cut out of sugar paste. It was a quite an easy cake to conquer.

For my birthday I went to Peggy Porschen's cafe in London. The inside was beautifully decorated in different shades of pinks. It also had a beautiful display of cakes and cupcakes. Heaven! I had a lovely double chocolate cupcake.

I was inspired to try to make my own beautifully decorated master piece!

Monday, 23 May 2011

Fresh Fruit Tart with Creme Chiboust


In my opinion these tarts are not worth all the effort to make from scratch, as I did not find the end product worth the amount of time the tarts took to make. Nowadays we can buy good pastry and creme patisserie in supermarkets and they are as good as homemade. But this recipe is good to follow to make any type of pastry. You could make the tart with just a creme patisserie inside and not bother with the italienne meringue. The italienne meringue only makes the filling lighter, due to all the air in the egg whites.


TIPS:

The key to making a creme patisserie is speed. Get all of the ingredients out and measured before starting to make it. If you stop mixing the creme patisserie whilst it is on the heat then it will form lumps, as mine did.

When making the italienne meringue a copper pan is essential as copper is very conductive and the sides of the pan need to be hot. If the sides of the pan are cool when you pour out the sugar syrup then it will harden before it reaches the egg whites. Also a stand up mixer is useful or another person to help because you need to pour on the sugar syrup whilst mixing the egg whites.

Ingredients:
For the pate sucre:
250g plain flour
100g unsalted butter, cold and diced into small squares
100g icing sugar, sifted
pinch of salt
2 eggs, at room temperature
For the creme patissiere:
3 egg yolks
40g Castor sugar
15g custard powder
175g milk
For the meringue italienne:
40ml water
180g Castor sugar
15ml glucose (available from most supermarkets)
3 egg whites


To make the pate sucre:


1) Weight out all of the ingredients.

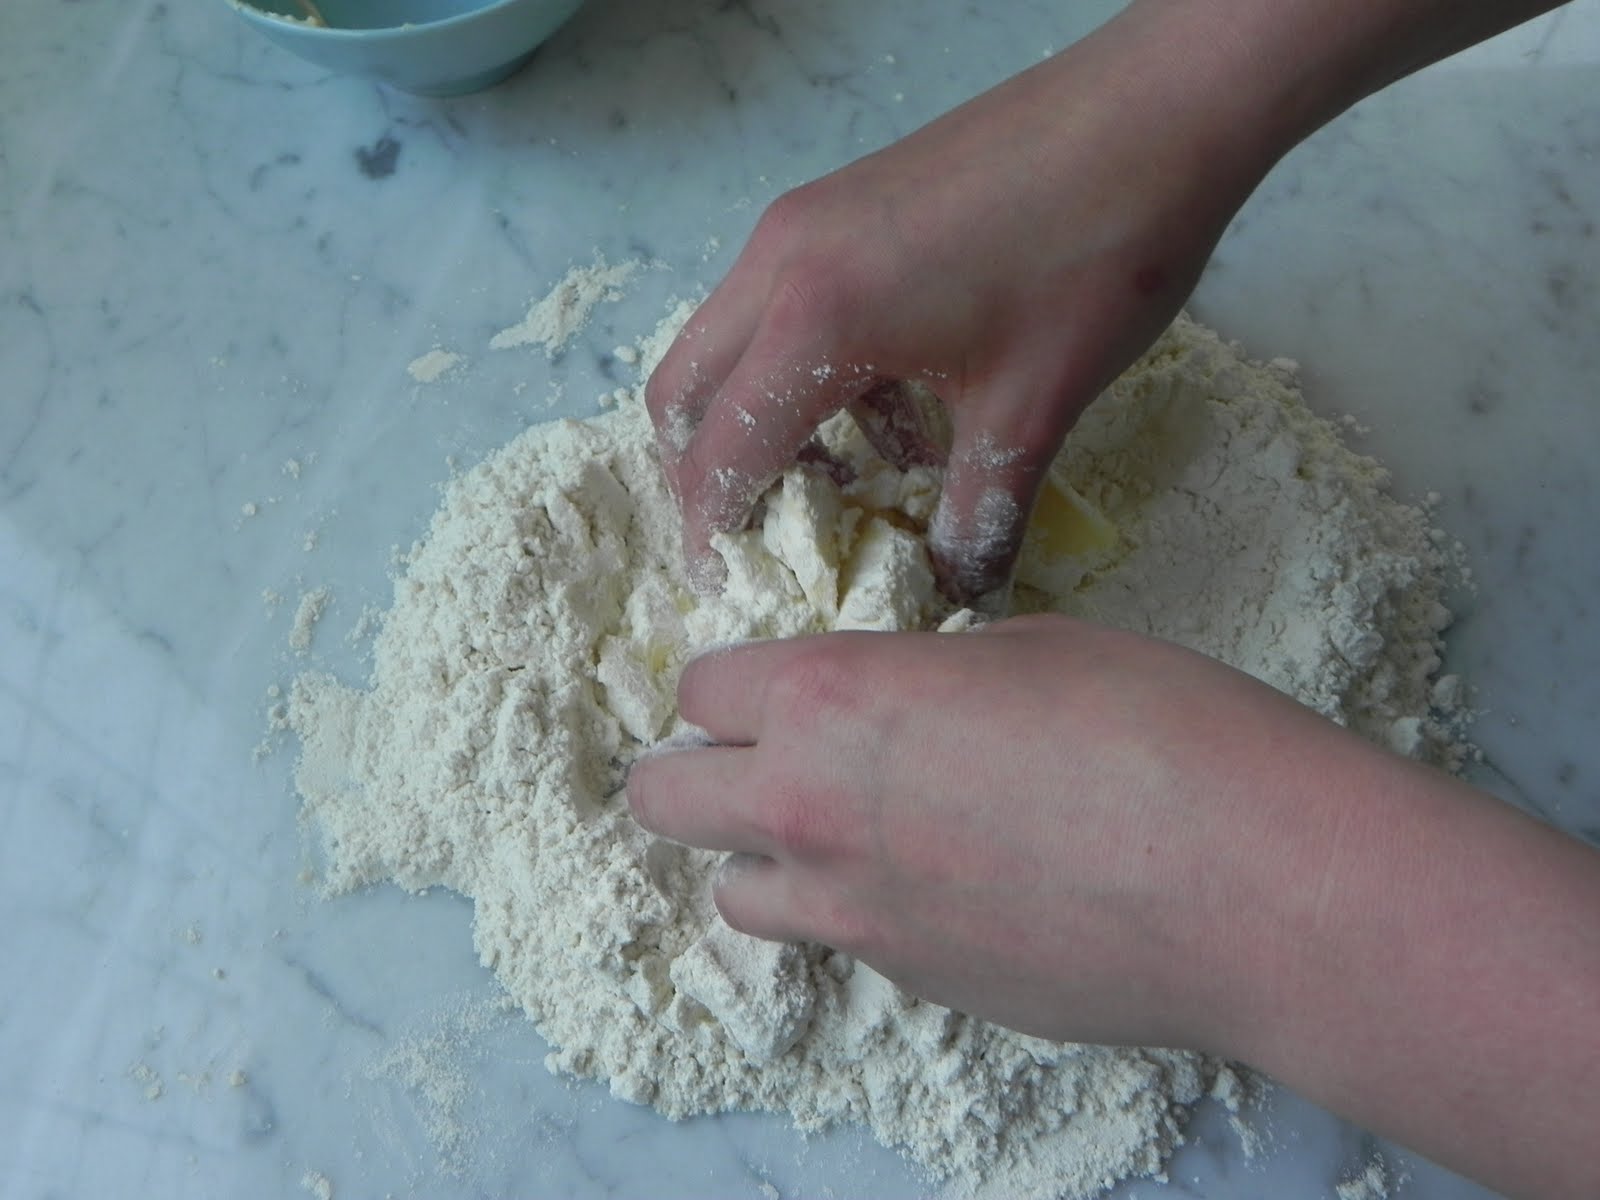
2) Pour the flour onto a clean work surface.

3) Make a well in the middle of the flour.

4) Pour the butter into the well in the middle of
 the flour.

5) Using your fingertips work the butter into
the flour. 


6) When the butter and flour are completely
combined, make another well in the centre
and pour in the icing sugar.

7) Next crack the two eggs into the well with the
 icing sugar. Using your finger tips combine the
 mixture into a ball. and place it in the fridge for
at least 1 hour or several days until you are
 ready to use it.


8) Remove the dough from the fridge and place
 onto a floured surface ready to roll.
Preheat the oven to C200.


9) Roll the dough out to about 5mm thick,
on a floured surface. 

10) Using a fluted pastry cutter cut out rounds.

11) Lightly grease your chosen tin and then place
 the pastry rounds into the tin.  Prick with a fork.


12) Line the bottom of the pastry case with
greaseproof paper and fill it will baking beans
or as I have used dried haricot beans. Cook until
the pastry is lightly golden at the edges.


To make the creme patisserie:

1) Combine the egg yolks and one third of
the sugar in a bowl.

2) Whisk the 2 together until they are pale and
 foamy. Sift in the custard powder and mix well.

3) Combine the rest of the sugar and milk in a
saucepan and bring to the boil. As soon
 as the mixture starts to boil pour one third onto
the egg mixture, stirring with a whisk to prevent
lumps forming.  Pour the mixture back into the
pan and boil over a gentle heat for 2 minutes.

4) Tip the custard back into a bowl and put
lumps of butter on the surface to stop a
skin forming. Set aside.

To make the meringue italienne:

1) Put the water, sugar and glucose in a copper
pan over a medium heat. Stir with a skimmer
until it boils. Wash down the sugar crystals
which form around the edges with a brush
 dipped in cold water.  Increase the heat
so the sugar boils rapidly.
 

2) Use a sugar thermometer to check when the
sugar reaches C110. At this point beat the
egg whites with an electric mixer until stiff.
Keep an eye on the sugar and take it off the
pan when it reaches C121


3) Pour the hot sugar syrup over the egg whites
in a thin stream whilst mixing the egg whites
at a low speed. Continue to mix a low speed
until the mixture is completely cool, about 15
minutes.


To make the creme chiboust:


1) Using a whisk stir in one third of the meringue
italienne into the creme patisserie .


2) Fold the rest of the meringue italienne into the
creme patissiere with a spatula. Do not over mix
 it or the cream will loose all its lightness.


3) Spoon the cream into the cooled pastry
cases and decorated with fresh fruit.

Saturday, 21 May 2011

'The Roux Brothers on Patisserie'

Earlier this month I found a 1986 copy of 'The Roux Brothers on Patisserie' at my grandmothers house and thought I would try out a recipe or two. I had heard that the Roux Brother's recipes were complicated and time consuming, but I didn't believe this until I tried one of their recipes for myself! After poring over the beautiful pictures of french cakes and tarts I came across a beautiful picture of a collection of Fruit Tartlets and Barquettes. The picture consisted of a range of sizes and shapes of tarlets decorated with figs, raspberries, strawberries, grapes, red currents, blueberries, gooseberries and mango. In the book there was no official recipe on how to make the tartlets, only a caption in the corner specifying the pastry used and the filling. The Recipes for these could be found elsewhere in the book. I thought that these tartlets looked irresistible and seemed simple enough to make.

A type of pastry called Pate Sucree was used, which translates to a sweet short pastry. The pastry was lined with a Creme Chiboust. Still sounding simple?

The Pate Sucree is a basic short crust pastry, which is in theory easy to work with. The Creme Chiboust is a creme patissiere mixed with a meringue italienne. Now it is sounding a bit more difficult.

Check back later to see how it went . . .

Friday, 13 May 2011

Nuala's Brownie Recipe

After weeks of testing and altering recipes I have finally created an amazing Brownie recipe. This recipe produces brownies which are chewy at the edges but are still dense and fudgy in the middle - just how I like them!

From Trail 3 I have decreased the amount of sugar by 30g which produces less of a crust on the brownies and makes them more fudgy. Also I cooked the brownies at a lower oven temperature (C160 not C180). This was because before the brownies started to burn at the edges and were not cooked in the middle.


Makes 16 small brownies. 

Ingredients:
200g dark chocolate
125g unsalted butter
145g castor sugar
3 eggs
110g plain flour

Method:
  1. Preheat the oven to C160. Line and grease a 20cm x 20cm baking tin. It is important that you use the correct size tin as a larger or smaller tin will give different results.
  2. Break the chocolate into a heatproof bowl and add the butter. Put the bowl over a pan with simmering water, at a medium heat. Mix occassionaly until all of the butter and chocolate is melted. Remove from the heat and leave to cool.
  3. Meanwhile crack the eggs into a bowl and add the sugar. Whisk together until combined. Be careful not to over whisk as this will give your brownies extra air which alter the end result creating more of a cakey brownie.  
  4. Pour the cooled melted chocolate and butter into the eggs and sugar mixture. Also pour in the flour. Fold together the mixture until it is just combined, being careful not to over mix.
  5. Pour the mixture into the prepared tin and place on the middle shelf of the oven. Cook for 40 minuites or until a skewer which is inserted into the middle of the mixture come out clean. Leave the brownies in the tin until completely cool. When cool remove from the tin and cut into 16 squares. Dust with icing sugar and enjoy!

Wednesday, 4 May 2011

Trail 3

If I thought the last recipe was a disaster I was wrong as these brownies were worse. I cooked the brownies for over an hour and they were still not cooked in the middle but burning on top. They also stuck to the pan, which I am not sure why as I greased the pan as I always do!

From the last trail I concluded that the mixture must be to wet and that is why it is not cooking. I therefore needed to decrease the wet ingredients and increase the dry ingredients. But I needed to be careful to not make the mixture to dry which would make the brownies too dry.

Trail 3

INGREDIENTS:
Butter: The amount of butter was decreased slightly to 125g.
Eggs: I decreased the amount of eggs back to 3 eggs, as 4 eggs gave the mixture too much moisture.
Sugar: The amount of sugar to egg was increased from 100g of sugar to 1 egg to 125g of sugar to 1 egg.
Chocolate: I kept the chocolate to 200g.
Flour: The flour was increased to 110g to make the mixture less wet.

METHOD:
To make these brownies the previous method was followed.
  1. Melt the chocolate and butter together over a low heat.
  2. Whisk the sugar and eggs together until just incorperated.
  3. Pour the melted chocolate mixture into the sugar and eggs and then add the flour.
  4. Cook at C180.