Search Nuala's Kitchen

Tuesday, 21 June 2011

Peggy Porschen


Peggy Porschen's Cafe
I discovered Peggy Porschen when I saw one of her amazing cookery books in a shop and couldn't resist buying it. The book was called 'Cake Chic' and included many reliable recipes for making different cakes. As well as inspiring decorating ideas and beautiful pictures of all of her cakes.

Visit Peggy Porschen's website at http://www.peggyporschen.com/ .

The first cake that I attempted was one called 'Mochaccino Dots'. It was a square chocolate cake layered with alternating flavours of butter cream; mocha butter cream and vanilla butter cream. The top was decorated with a layer of brown sugar paste and then large dots cut out of sugar paste. It was a quite an easy cake to conquer.

For my birthday I went to Peggy Porschen's cafe in London. The inside was beautifully decorated in different shades of pinks. It also had a beautiful display of cakes and cupcakes. Heaven! I had a lovely double chocolate cupcake.

I was inspired to try to make my own beautifully decorated master piece!

Monday, 23 May 2011

Fresh Fruit Tart with Creme Chiboust


In my opinion these tarts are not worth all the effort to make from scratch, as I did not find the end product worth the amount of time the tarts took to make. Nowadays we can buy good pastry and creme patisserie in supermarkets and they are as good as homemade. But this recipe is good to follow to make any type of pastry. You could make the tart with just a creme patisserie inside and not bother with the italienne meringue. The italienne meringue only makes the filling lighter, due to all the air in the egg whites.


TIPS:

The key to making a creme patisserie is speed. Get all of the ingredients out and measured before starting to make it. If you stop mixing the creme patisserie whilst it is on the heat then it will form lumps, as mine did.

When making the italienne meringue a copper pan is essential as copper is very conductive and the sides of the pan need to be hot. If the sides of the pan are cool when you pour out the sugar syrup then it will harden before it reaches the egg whites. Also a stand up mixer is useful or another person to help because you need to pour on the sugar syrup whilst mixing the egg whites.

Ingredients:
For the pate sucre:
250g plain flour
100g unsalted butter, cold and diced into small squares
100g icing sugar, sifted
pinch of salt
2 eggs, at room temperature
For the creme patissiere:
3 egg yolks
40g Castor sugar
15g custard powder
175g milk
For the meringue italienne:
40ml water
180g Castor sugar
15ml glucose (available from most supermarkets)
3 egg whites


To make the pate sucre:


1) Weight out all of the ingredients.

2) Pour the flour onto a clean work surface.

3) Make a well in the middle of the flour.

4) Pour the butter into the well in the middle of
 the flour.

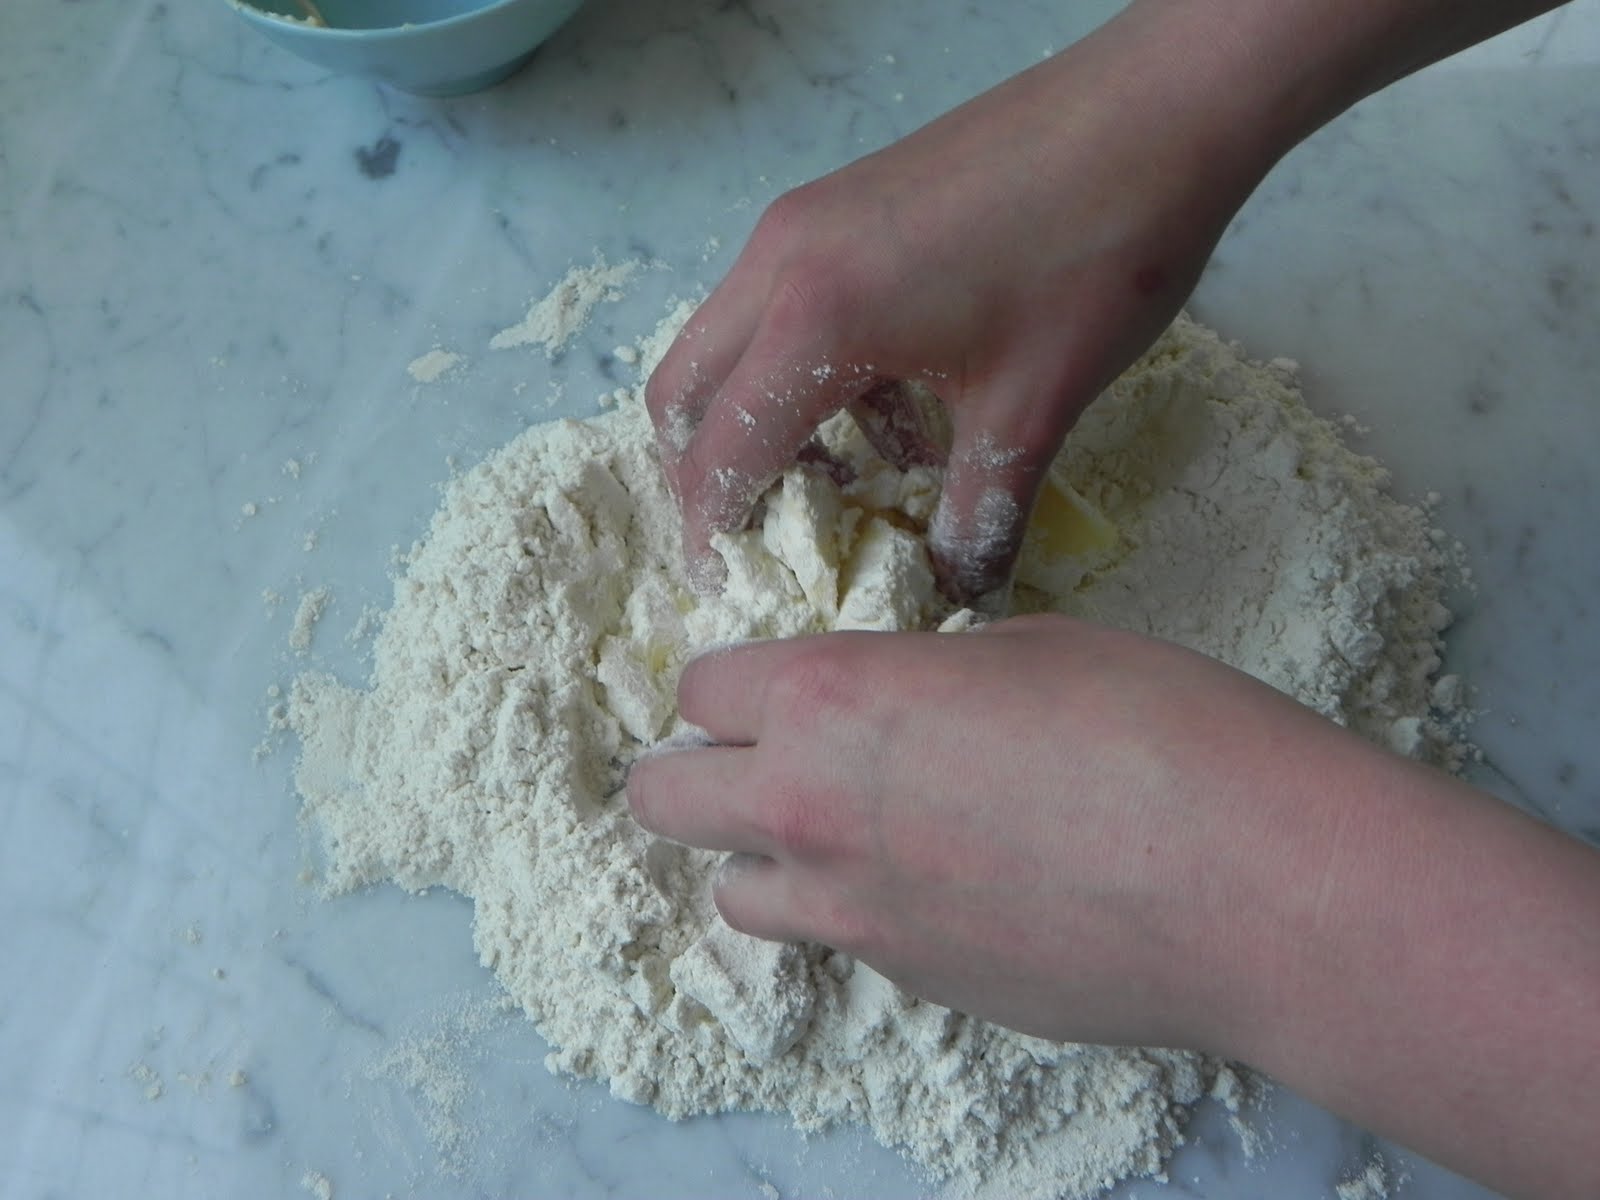
5) Using your fingertips work the butter into
the flour. 


6) When the butter and flour are completely
combined, make another well in the centre
and pour in the icing sugar.

7) Next crack the two eggs into the well with the
 icing sugar. Using your finger tips combine the
 mixture into a ball. and place it in the fridge for
at least 1 hour or several days until you are
 ready to use it.


8) Remove the dough from the fridge and place
 onto a floured surface ready to roll.
Preheat the oven to C200.


9) Roll the dough out to about 5mm thick,
on a floured surface. 

10) Using a fluted pastry cutter cut out rounds.

11) Lightly grease your chosen tin and then place
 the pastry rounds into the tin.  Prick with a fork.


12) Line the bottom of the pastry case with
greaseproof paper and fill it will baking beans
or as I have used dried haricot beans. Cook until
the pastry is lightly golden at the edges.


To make the creme patisserie:

1) Combine the egg yolks and one third of
the sugar in a bowl.

2) Whisk the 2 together until they are pale and
 foamy. Sift in the custard powder and mix well.

3) Combine the rest of the sugar and milk in a
saucepan and bring to the boil. As soon
 as the mixture starts to boil pour one third onto
the egg mixture, stirring with a whisk to prevent
lumps forming.  Pour the mixture back into the
pan and boil over a gentle heat for 2 minutes.

4) Tip the custard back into a bowl and put
lumps of butter on the surface to stop a
skin forming. Set aside.

To make the meringue italienne:

1) Put the water, sugar and glucose in a copper
pan over a medium heat. Stir with a skimmer
until it boils. Wash down the sugar crystals
which form around the edges with a brush
 dipped in cold water.  Increase the heat
so the sugar boils rapidly.
 

2) Use a sugar thermometer to check when the
sugar reaches C110. At this point beat the
egg whites with an electric mixer until stiff.
Keep an eye on the sugar and take it off the
pan when it reaches C121


3) Pour the hot sugar syrup over the egg whites
in a thin stream whilst mixing the egg whites
at a low speed. Continue to mix a low speed
until the mixture is completely cool, about 15
minutes.


To make the creme chiboust:


1) Using a whisk stir in one third of the meringue
italienne into the creme patisserie .


2) Fold the rest of the meringue italienne into the
creme patissiere with a spatula. Do not over mix
 it or the cream will loose all its lightness.


3) Spoon the cream into the cooled pastry
cases and decorated with fresh fruit.

Saturday, 21 May 2011

'The Roux Brothers on Patisserie'

Earlier this month I found a 1986 copy of 'The Roux Brothers on Patisserie' at my grandmothers house and thought I would try out a recipe or two. I had heard that the Roux Brother's recipes were complicated and time consuming, but I didn't believe this until I tried one of their recipes for myself! After poring over the beautiful pictures of french cakes and tarts I came across a beautiful picture of a collection of Fruit Tartlets and Barquettes. The picture consisted of a range of sizes and shapes of tarlets decorated with figs, raspberries, strawberries, grapes, red currents, blueberries, gooseberries and mango. In the book there was no official recipe on how to make the tartlets, only a caption in the corner specifying the pastry used and the filling. The Recipes for these could be found elsewhere in the book. I thought that these tartlets looked irresistible and seemed simple enough to make.

A type of pastry called Pate Sucree was used, which translates to a sweet short pastry. The pastry was lined with a Creme Chiboust. Still sounding simple?

The Pate Sucree is a basic short crust pastry, which is in theory easy to work with. The Creme Chiboust is a creme patissiere mixed with a meringue italienne. Now it is sounding a bit more difficult.

Check back later to see how it went . . .

Friday, 13 May 2011

Nuala's Brownie Recipe

After weeks of testing and altering recipes I have finally created an amazing Brownie recipe. This recipe produces brownies which are chewy at the edges but are still dense and fudgy in the middle - just how I like them!

From Trail 3 I have decreased the amount of sugar by 30g which produces less of a crust on the brownies and makes them more fudgy. Also I cooked the brownies at a lower oven temperature (C160 not C180). This was because before the brownies started to burn at the edges and were not cooked in the middle.


Makes 16 small brownies. 

Ingredients:
200g dark chocolate
125g unsalted butter
145g castor sugar
3 eggs
110g plain flour

Method:
  1. Preheat the oven to C160. Line and grease a 20cm x 20cm baking tin. It is important that you use the correct size tin as a larger or smaller tin will give different results.
  2. Break the chocolate into a heatproof bowl and add the butter. Put the bowl over a pan with simmering water, at a medium heat. Mix occassionaly until all of the butter and chocolate is melted. Remove from the heat and leave to cool.
  3. Meanwhile crack the eggs into a bowl and add the sugar. Whisk together until combined. Be careful not to over whisk as this will give your brownies extra air which alter the end result creating more of a cakey brownie.  
  4. Pour the cooled melted chocolate and butter into the eggs and sugar mixture. Also pour in the flour. Fold together the mixture until it is just combined, being careful not to over mix.
  5. Pour the mixture into the prepared tin and place on the middle shelf of the oven. Cook for 40 minuites or until a skewer which is inserted into the middle of the mixture come out clean. Leave the brownies in the tin until completely cool. When cool remove from the tin and cut into 16 squares. Dust with icing sugar and enjoy!

Wednesday, 4 May 2011

Trail 3

If I thought the last recipe was a disaster I was wrong as these brownies were worse. I cooked the brownies for over an hour and they were still not cooked in the middle but burning on top. They also stuck to the pan, which I am not sure why as I greased the pan as I always do!

From the last trail I concluded that the mixture must be to wet and that is why it is not cooking. I therefore needed to decrease the wet ingredients and increase the dry ingredients. But I needed to be careful to not make the mixture to dry which would make the brownies too dry.

Trail 3

INGREDIENTS:
Butter: The amount of butter was decreased slightly to 125g.
Eggs: I decreased the amount of eggs back to 3 eggs, as 4 eggs gave the mixture too much moisture.
Sugar: The amount of sugar to egg was increased from 100g of sugar to 1 egg to 125g of sugar to 1 egg.
Chocolate: I kept the chocolate to 200g.
Flour: The flour was increased to 110g to make the mixture less wet.

METHOD:
To make these brownies the previous method was followed.
  1. Melt the chocolate and butter together over a low heat.
  2. Whisk the sugar and eggs together until just incorperated.
  3. Pour the melted chocolate mixture into the sugar and eggs and then add the flour.
  4. Cook at C180.

Thursday, 28 April 2011

Royal Wedding Cookies

Wedding Cake Sugar Cookies
In honour of the Royal Wedding I made some wedding cake shaped cookies.
Wedding Cake Sugar Cookies

Ingredients:
200g unsalted butter
200g Castor sugar
1 medium egg
400g plain flour

Method:
  1. Cream together the butter and sugar, until light and fluffy.
  2. Add the egg and mix on a very low speed until just Incorporated. Over mixing will cause the cookies to spread when they cook.
  3. Next add in the flour. Mix at a low speed until the mixture comes together as a dough. This will take about 5 minutes.
  4. Cling film the dough and refrigerator for at least 1 hour. The dough can stay in the fridge for up to a week.
  5. Preheat the oven to C200. Take the dough out of the fridge about 5 minutes before it is needed. This gives the dough time to warm up slightly so it is able to be rolled out.
  6. Roll out the dough on a lightly floured surface to a centimeter thick. Cut out you desired shape, I used a wedding cake cutter.
  7. Place the cut out dough on a greased baking sheet and cook in the oven for 6 - 11 minutes or until slightly golden.
  8. If you want to ice the cookies cool for at least 45 minutes. Ice with royal icing or simple icing (icing sugar and water).

Saturday, 23 April 2011

Brownie Recipe: Trail 2

So I made the Brownies from trail 1. I was a little disappointed, but it was only my first test recipe so I couldn't expect to much!

When I made the brownies I beat the eggs and sugar quite a bit which gave the mixture air, so it rose slightly. With hindsight this was not the correct thing to do as it made the brownies have a cakey texture instead of the desired fudgy and chewy texture. The brownies took 50 minutes to cook, which was a very long time!When the brownies came out of the oven the middle sunk slightly - again not a good sign!

Next was to taste the brownie. The flavour of the brownie was very good. The texture in the middle of the brownies were more like a flour less sponge, then a brownie. But at the edges the desired chewy texture was achieved. From this I think the sugar content and chocolate content are correct.

Trail 2
INGREDIENT:
Butter - I increased the amount of butter slightly from 110g to 150g. To make a cakey brownie a low butter content is needed. I did not want cakey brownies so increased the butter content to move away from that.
Eggs - To make a chewy brownie there should be an extra egg to the recipe, which I have already added. I was going to add another egg which would hopefully help make the brownies more chewy (4 eggs in total).
Sugar - I felt that the previous brownies had enough sugar so wanted to keep the same proportions. I therefore increase the sugar to 400g so there was 100g of sugar per egg.
Chocolate - The flavour of the brownies was very good, so I am not going to alter the amount of chocolate but keep it at 200g.
Plain Flour - I did not like the flour less chocolate cake texture of the previous brownies, so I increased the amount of flour to 100g.

METHOD:
As I said above beating the sugar and eggs was a mistake due it adding air to the mixture which causes the brownies to rise. Therefore I was going to just mix the sugar and eggs until incorporated, and try to keep any mixing at a minim. This should make the brownies more fudgy and chewy and not cakey. Except from that alteration the rest of the method I kept the same.

Sunday, 17 April 2011

Brownie Recipe: Trail 1

Well I feel as though I have eaten and examined a lot of Brownie recipes and so now it was time to create my own recipe. So far, my favourite recipe for fudgy brownies was the Baker's Manual's Recipe, for cakey brownies the Mary Berry's recipe and for chewy brownies the Lowey recipe. After testing out the different recipe I wanted to follow the method of melting the butter and chocolate, whisking the sugar and eggs and then folding the ingredients together with the flour.

I decided to take aspects from each of the recipes to start testing out different combinations of the 5 main ingredients; butter, sugar, chocolate, eggs and plain flour.

For my first test recipe I added the same amount of butter (110g) and plain flour (75g) as Lowey's orginal recipe, but alter the amount of sugar, chocolate and eggs. The low flour and butter content is suppose to make the brownies fudgy, which I really like! To make the brownies chewy an extra egg was added and there was a high sugar content. I therefore increased the amount of sugar from 225g to 300g which works out similare to Martha Stewart's proportion of eggs to sugar. Stewarts was around 150g of sugar to each egg whereas I chose to use 100g of sugar for each egg. I don't really have any guidlines on how much chocolate to add, but wanted to have a high amount to give the brownies a rich flavour. So I am going to take a flyer and add 200g as the chocolate I like to buy comes in 200g bars!

Well I have figured out the recipe so now all I need to do is try it! Wish me luck!

Tuesday, 12 April 2011

The Baker's Manual's Brownies


Baker's Manual's Brownies
For dense, rich and fudgy brownies these are it!

This recipe uses the same amount of sugar and flour as the Lowey's recipe but has a higher amount of butter, chocolate and eggs. Which makes them so fudgy and rich!


These brownies are also great or even better the next day, so can be made ahead of time.


Baker's Manual's Brownies
Ingredients: 
170g butter
300g chocolate, chopped
225g Castor sugar
4 eggs
75g plain flour
1/4 teaspoon salt


Method: 
  1. Grease and flour a 9 inch square baking pan. Preheat the oven at C180. 
  2. In a sauce pan, over a low heat melt the butter and then stir in the broken up chocolate. Still over a low heat mix the chocolate until it has all melted.
  3. In a bowl mix together the sugar and eggs.
  4. Stir in the melted chocolate and butter. Fold in the flour and salt until just combined and then pour into the prepared baking tin.
  5. Cook for 35 - 40 minutes  or until a skewer inserted two or three inches from the centre comes out with only moist crumbs clinging to it.
  6. Cool the brownies before removing from the pan and cutting.

Tuesday, 5 April 2011

Help, my ganache has separated!

Every cook has had the agonising moment when they pour the cream over the chocolate and as they whisk it together it separates. The ganache changes from a smooth creamy mixture to a  grainy mixture with an oil/fat liquid on top of the chocolate mixture in a matter of seconds.

When I make ganache I either melt the chocolate and pour over room temperature cream (not straight from the fridge as this will cause the ganache to separate) or I boil the cream and pour it over the broken chocolate. I find the results of both of these methods are very hit and miss. This is due to that fact that it is very difficult to get the cream and chocolate at the correct temperatures.

If the very cold cream is poured over the melted chocolate than it will seize. If the ganche is put straight in the fridge after it is made then it will also seize. The key is to get similar temperatures between the chocolate and cream. Chocolate has a low melting point between C31 - C32 (average room temperature is C27) so the cream doesn't have to be that hot.

My grandmother's method of making a ganache is to heat the cream first. Once it starts to boil take it off the heat and let is cool for about a minute or two (so it is at a luke warm temperature to the skin). Then the slightly cooled cream is poured over the broken up chocolate and whisked together. She also showed me a way to save a separated ganache. Pour the cooled separated ganche into a food processor and whiz it, slowly pouring in some more cool double cream until the ganche comes together again as a smooth mixture (think of the lint ads!)